
Getting Started with XOGO
XOGO is an affordable, easy to use digital signage platform that runs on the ViewSonic model NMP620-p10 media player PC. It's completely free to download and use for one digital sign; if you want to unlock pro features or deploy more than one sign you can upgrade to pro right in our app for $20 per sign per month*. Here's how to get started with XOGO.
Step 1:
Visit our downloads page to get the XOGO Manager app for your Windows or Android device (iOS coming soon!) This app allows you to create a XOGO account, upload images and video content, and create one or more playlists.
Step 2:
Next we need to set up your media player device. If you have a ViewSonic PC, simply connect it to your ViewSonic display with an HDMI cable. Connect a USB keyboard and mouse to the USB ports on the front, and plug the device into a power source. Push the power button on the front of the media player and you'll see the familiar Windows 10 interface. Connect the media player to a WiFi network or a wired ethernet network and launch the XOGO Player app. You will then see a QR code and PIN code appear on the display, like the one below.

Figure 1: Initial screen of XOGO Player App
Step 3:
Using the XOGO Manager app on your mobile device, tap New to upload still images or videos into the Library section. Then tap New and create one or more playlists of content. Finally, tap New in the Player section and scan the QR code (or enter the PIN) displayed on your media player's screen to associate the media player with your unique XOGO account. Assign the media player a playlist and it will sync with the cloud (requires Internet connectivity) and immediately begin looping your content. It's now a digital sign! (See our Getting Started page for a video showing how to setup XOGO Manager and add content, playlists and players.)

Figure 2: Click New to add content, playlists and media players.
Step 4:
For the best experience, we recommend setting your media player PC to assigned access mode. This is a feature in Windows 10 that will automatically launch a particular application as soon as the media player boots. In this case, you can set your media player to automatically launch XOGO and play your content when it boots up. So even if there is a loss of power, when the PC turns back on it will automatically play your playlist again!
Step 5:
Whenever you wish to make changes to playlists or add more media players, simply log into the XOGO Content Manager app and make your edits. Changes are pushed to your media players via the cloud. Automagically.
Bonus: Realtime Mode
XOGO Content Manager is more than just a content uploading tool - it's a real time remote control! Just select RealTime mode in the control panel and (provided that your media player and controller device are both connected to the Internet) you can make any content on your media player PC play in real time. Right from your phone or tablet!
And because you can set items to be invisible within a playlist, you can have your normal media content playing and then interrupt it with something that has been invisible. This is a perfect scenario for retail, as an example - you can interrupt a looping "attract" video in order to pull up tech specs, pricing or information.

Figure 3: Items can be made invisible within playlists, until exposed in Realtime mode.
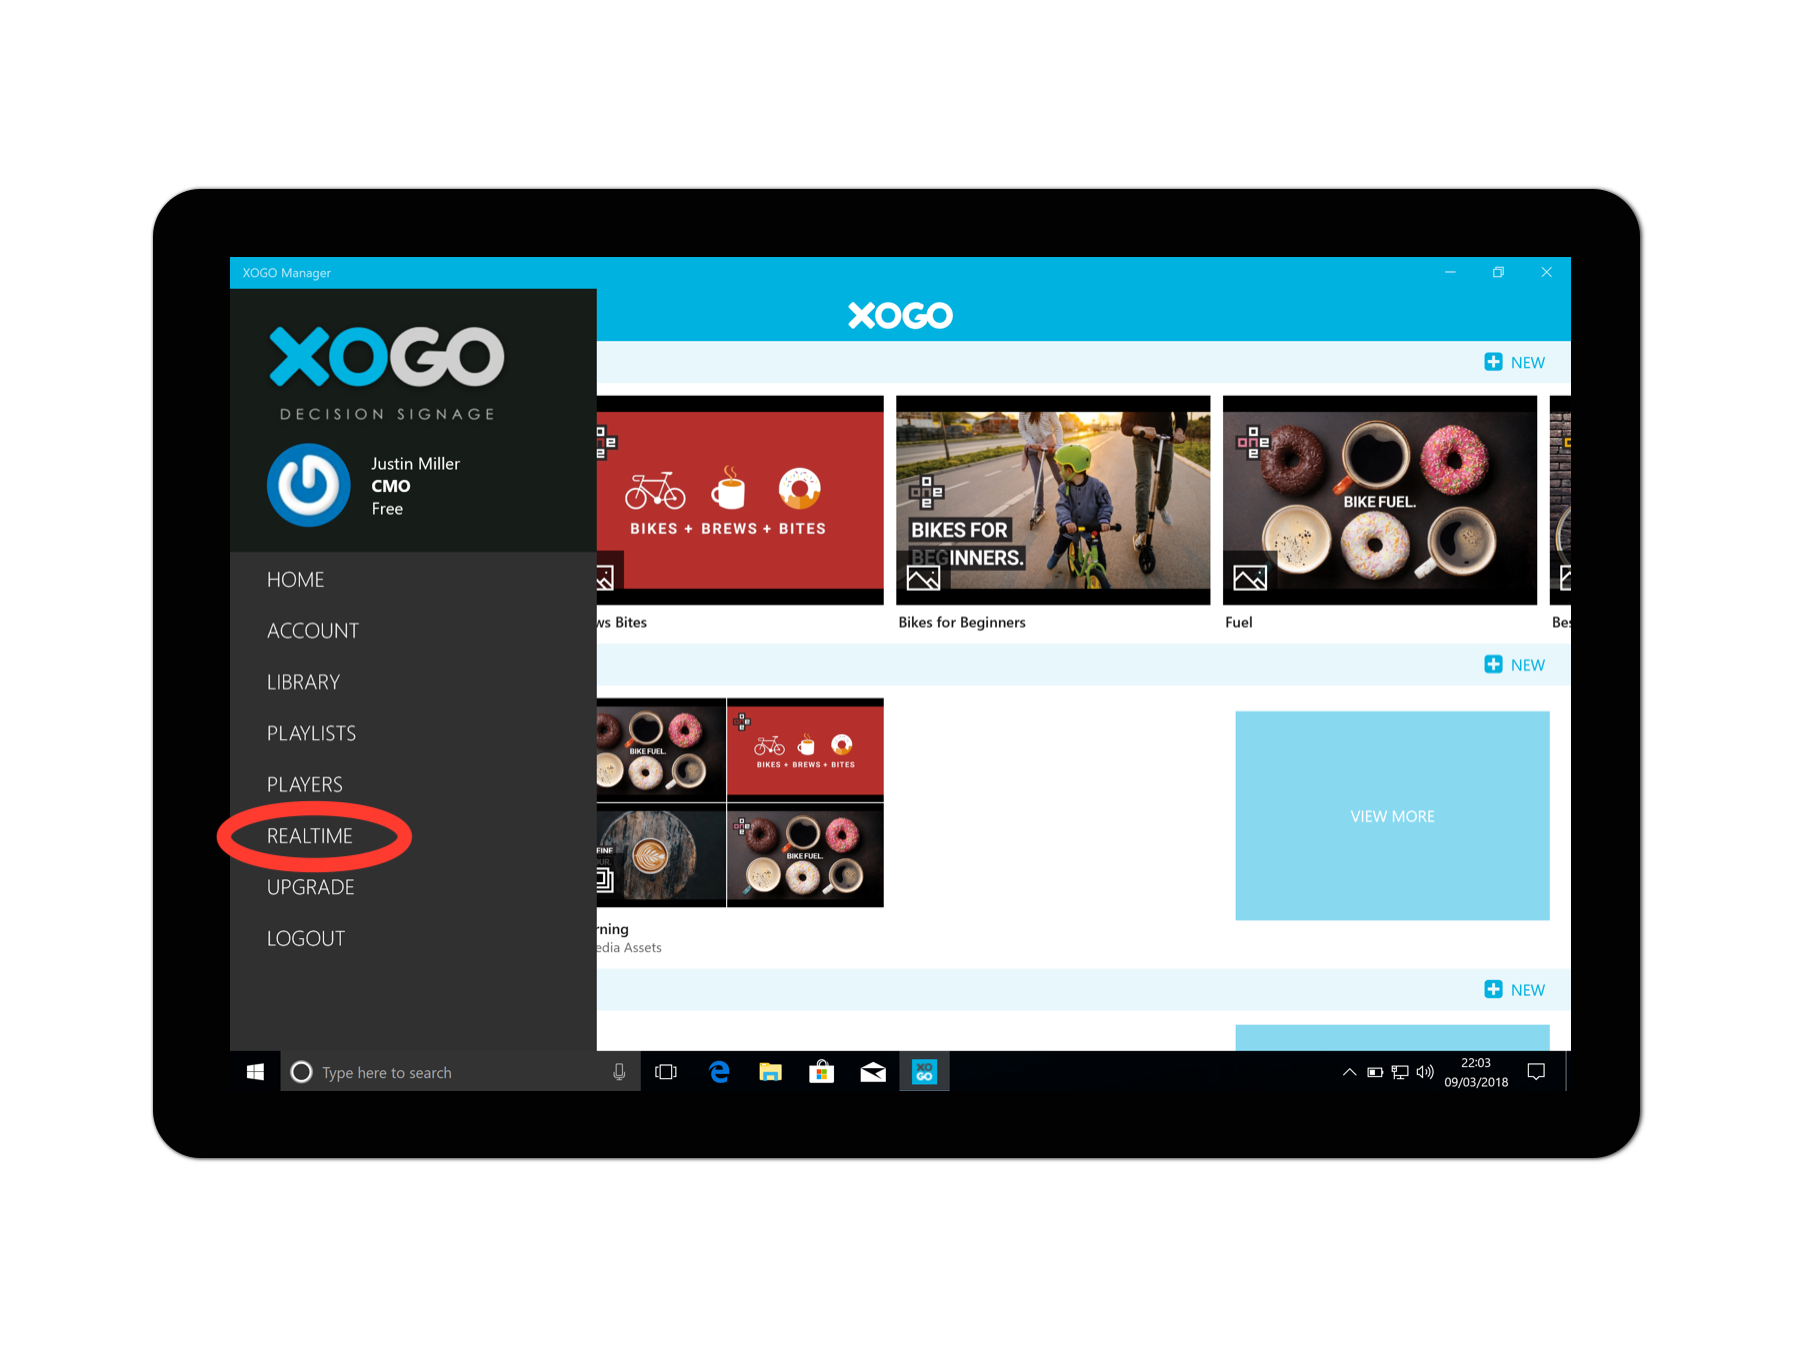
Figure 4: Select Realtime mode to immediately trigger any of your visible / invisible playlist content.
Thanks for choosing ViewSonic and XOGO. If you need further assistance with your new digital signage software, please take a look at our FAQ page or contact us for support.
*Or choose to pay annually and save 25%!